If you’re familiar with running dedicated servers for games like Valheim, the process should be fairly straightforward. But if this is your first foray into the world of dedicated servers, you’ve come to the right place. Below I’m going to explain exactly how to set up, configure, launch, and join your own dedicated server. The below walkthrough covers every single step from start to finish, and we’ll even go into detail about the small confusing steps like setting up Port-Forwarding, allowing your server through your Firewall, and turning your existing private game into a dedicated server to enjoy with your friends. On this page:
How to set up a V Rising dedicated server V Rising server settings explained How to start and shut down your V Rising server How to turn your private V Rising game into a dedicated server How to set up Port-Forwarding for your V Rising server How to let your V Rising server through the Firewall How to join a V Rising dedicated server Why set up a dedicated server for V Rising? How to play V Rising multiplayer without a dedicated server How to play V Rising multiplayer offline
How to set up a V Rising dedicated server
There are three different ways to set up a V Rising dedicated server:
Rent a server from GPortal (costs money). Set up a server with SteamCMD (free). Set up a server from Steam itself (free).
It sounds complex, but don’t worry - I’ll explain each one in more detail below.
How to rent a server from GPortal
V Rising’s official servers are all hosted by GPortal, and if you’re okay with paying money to take away all the hassle of setting up your own dedicated server, you can rent your own personal server from them too. Head to the V Rising Server Hosting page on GPortal, and then choose the server plan that best suits your needs - or create your own configuration. The benefits of using GPortal are ease of use, and a high performance server. The downside, of course, is that you need to pay for it. If you want to set up your own server for free, use one of the two options below instead.
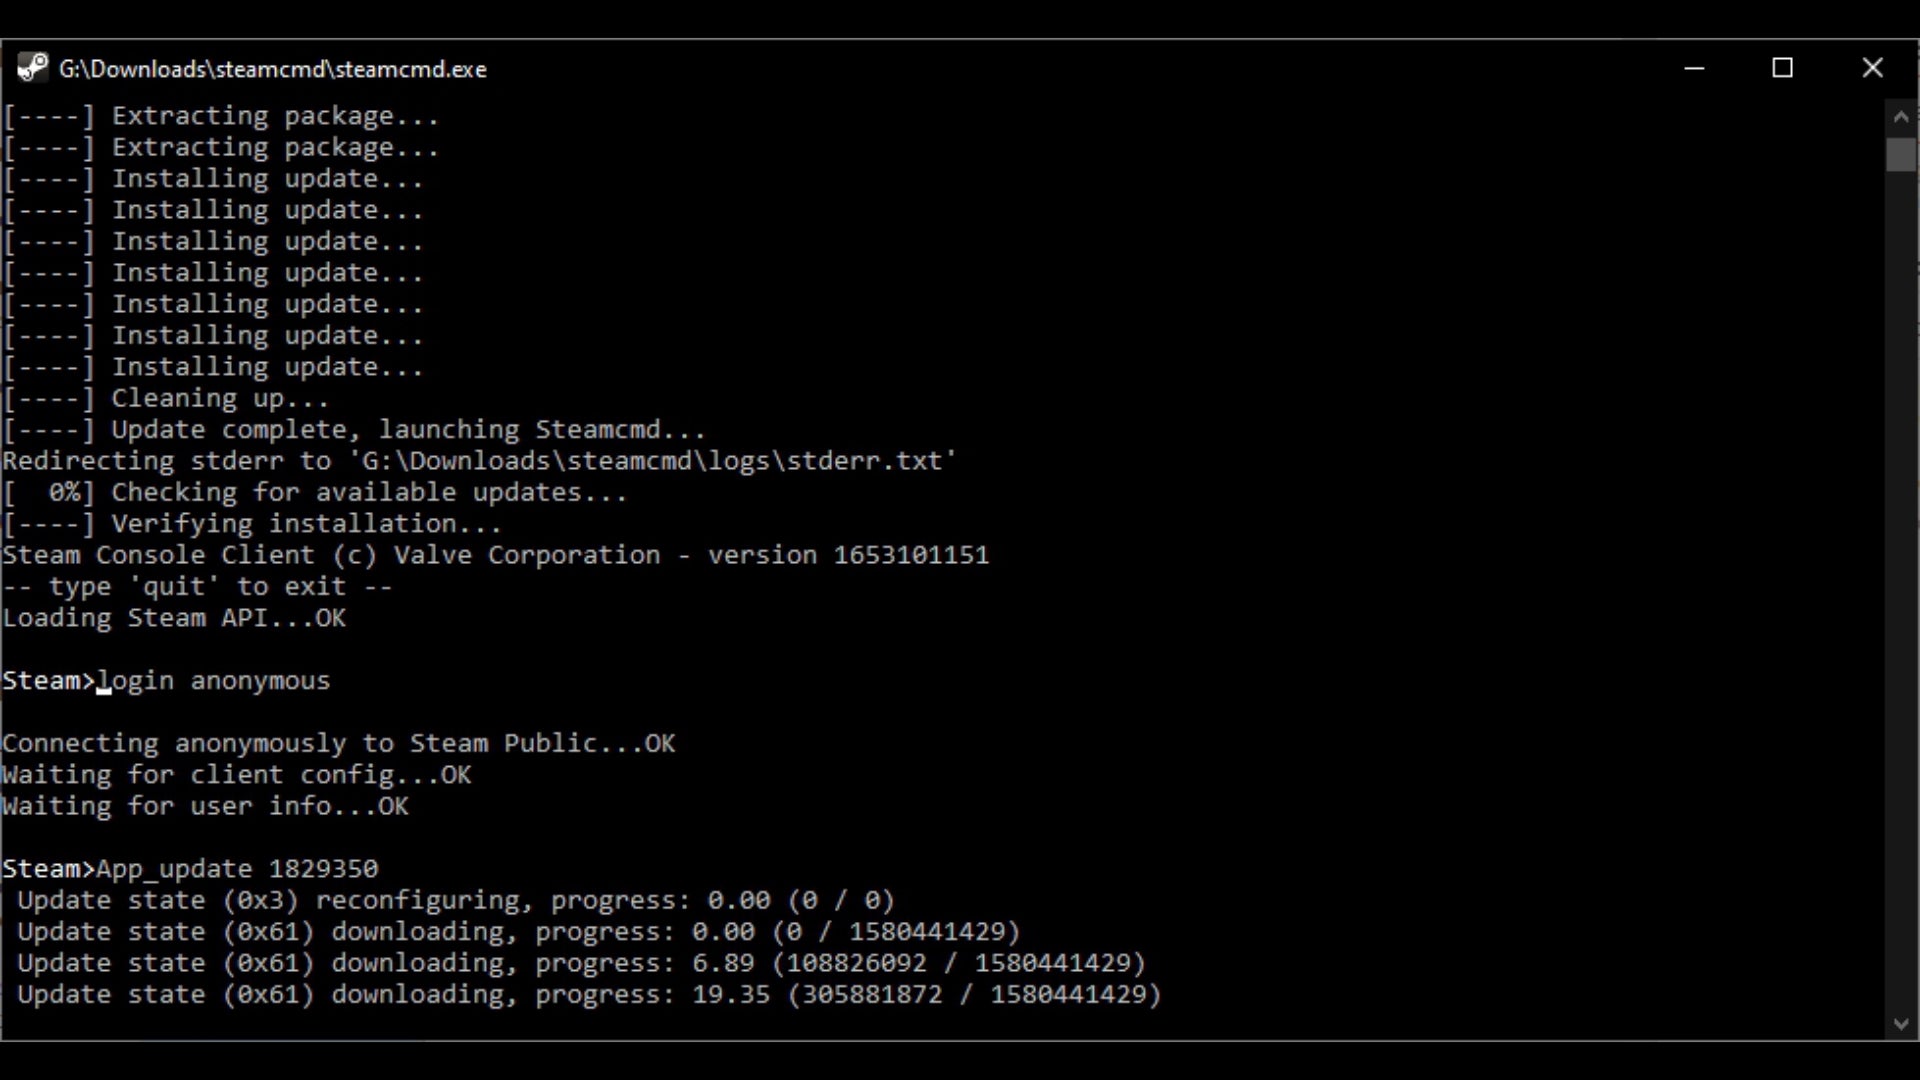
Set up a server with SteamCMD
Lots of players of Steam games like to use SteamCMD to host their own dedicated servers, and V Rising is no exception. If you want to use SteamCMD, here’s what to do: From here you can then follow the instructions in the next section: V Rising server settings explained.
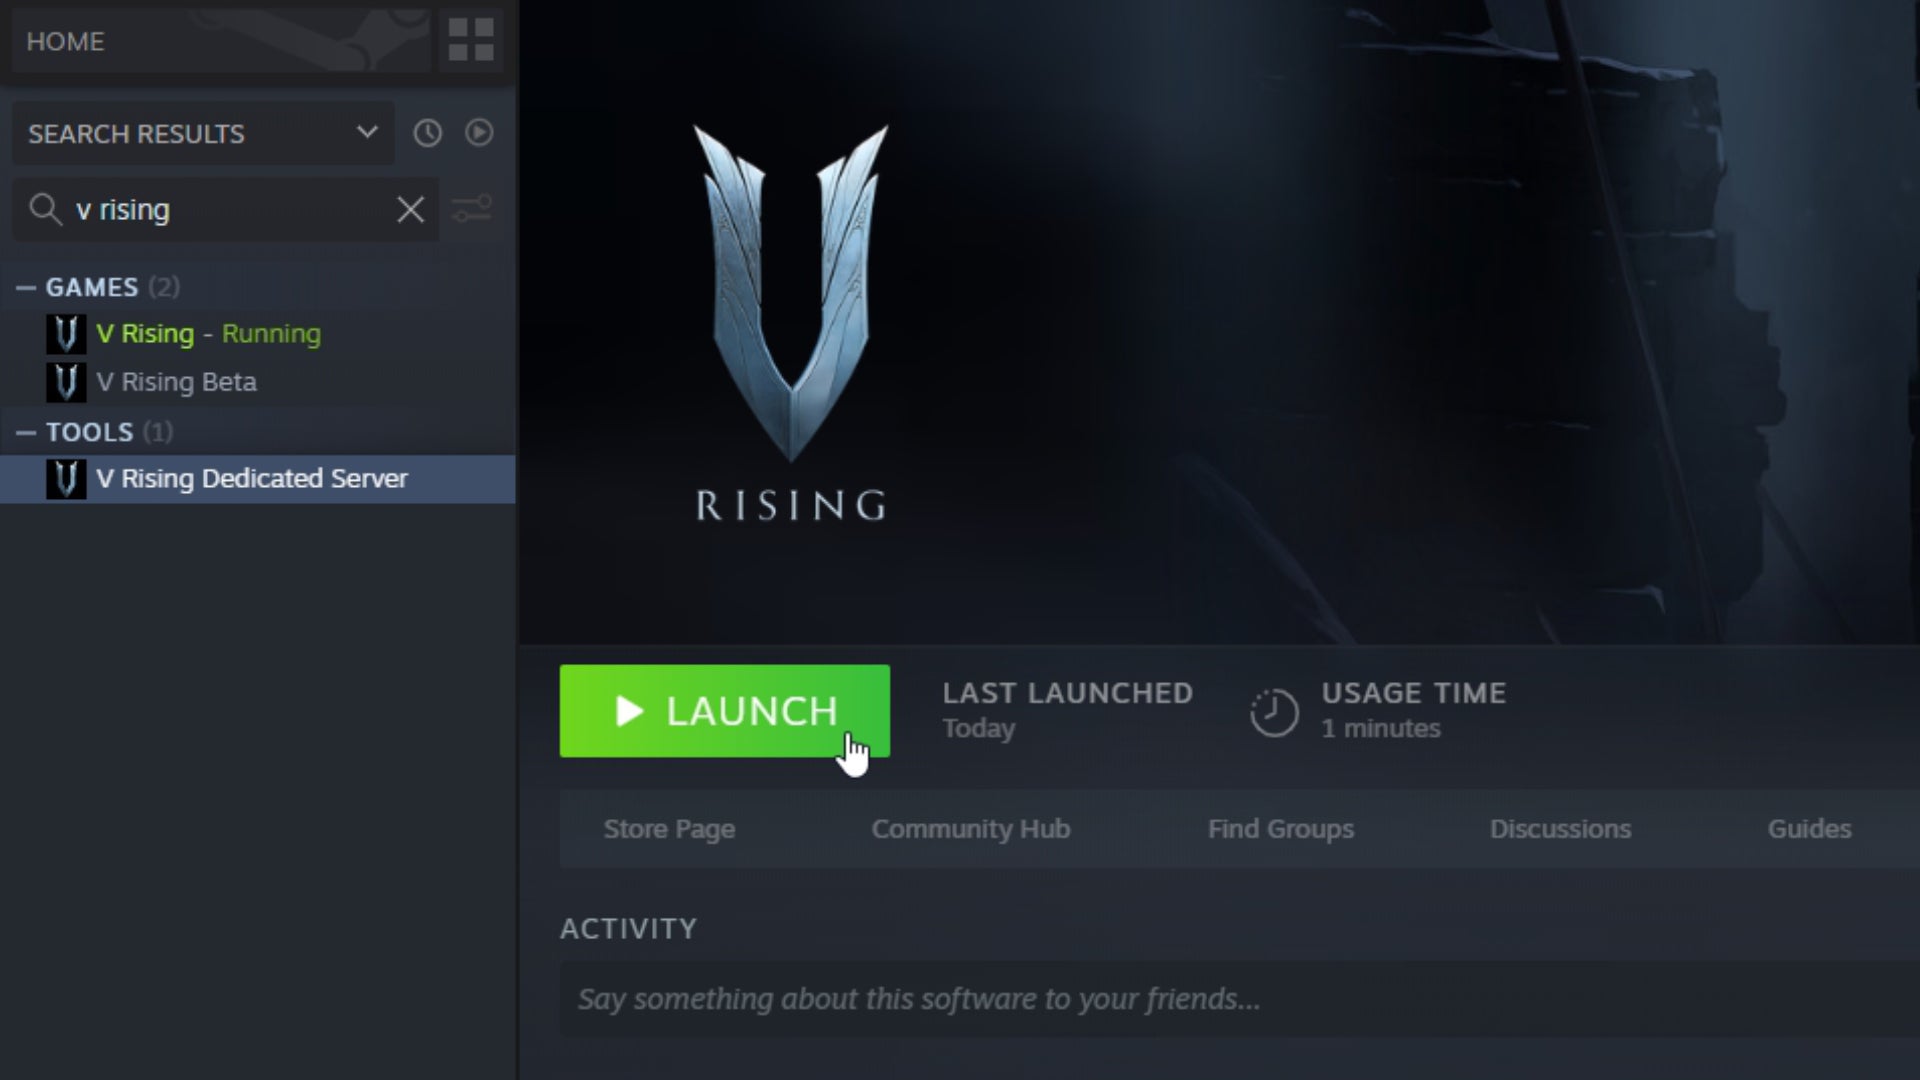
Set up a server from Steam itself
Here’s another way to arrive at exactly the same point as the above, one which doesn’t involve having to download SteamCMD. Whichever of the above two methods you use, you’ll end up with a folder filled with server files ready for setting up your own dedicated server.
V Rising server settings explained
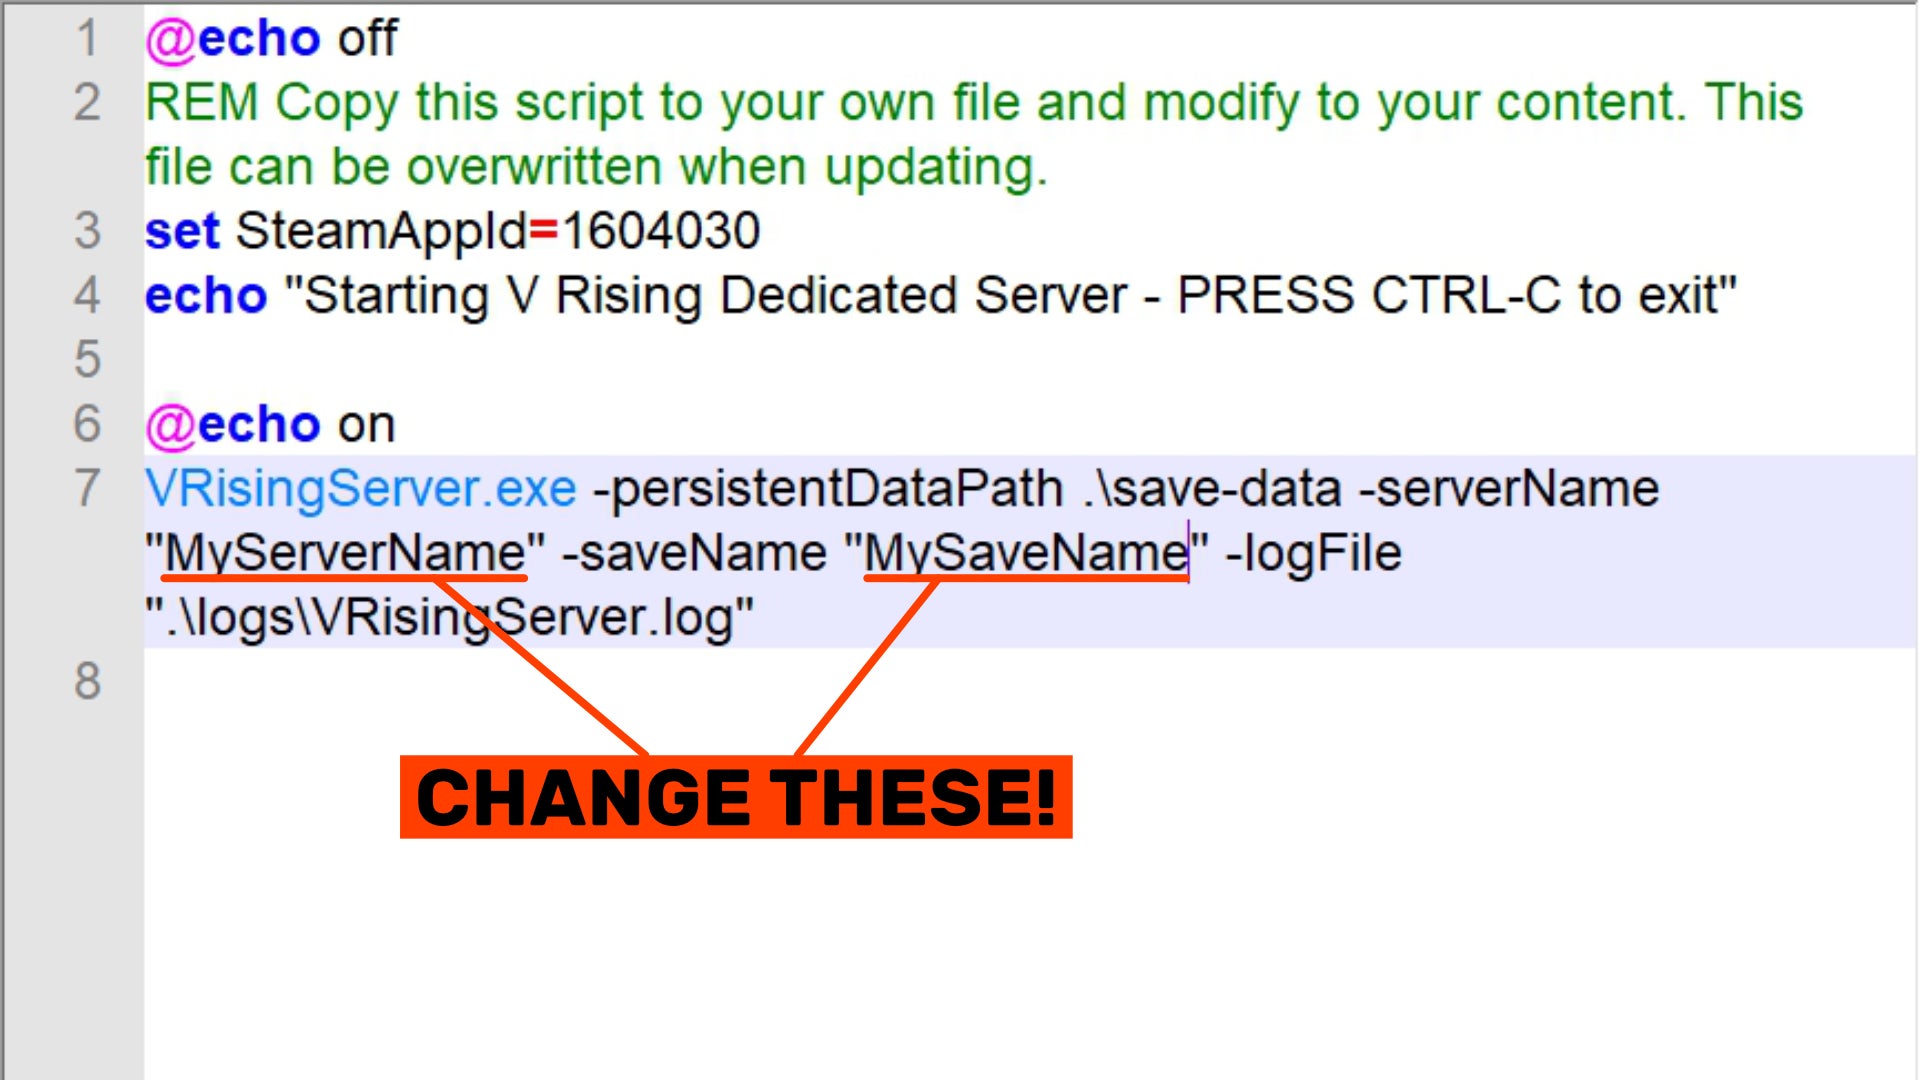
Most of the files you’ve downloaded, you can ignore. But a few are important for setting up your V Rising server exactly how you want it. First, right-click the “start_server_example.bat” file and click Edit. In the final line, change the following:
Add a server name in the quotes after “-serverName”. This is the name that will appear in the V Rising server list in-game. Add a save name in the quotes after “-saveName”. This is the name that appears in your save files out of game.
Now save and quit this file. Next, navigate to “VRisingServer_Data/StreamingAssets/Settings”. In here are four important files:
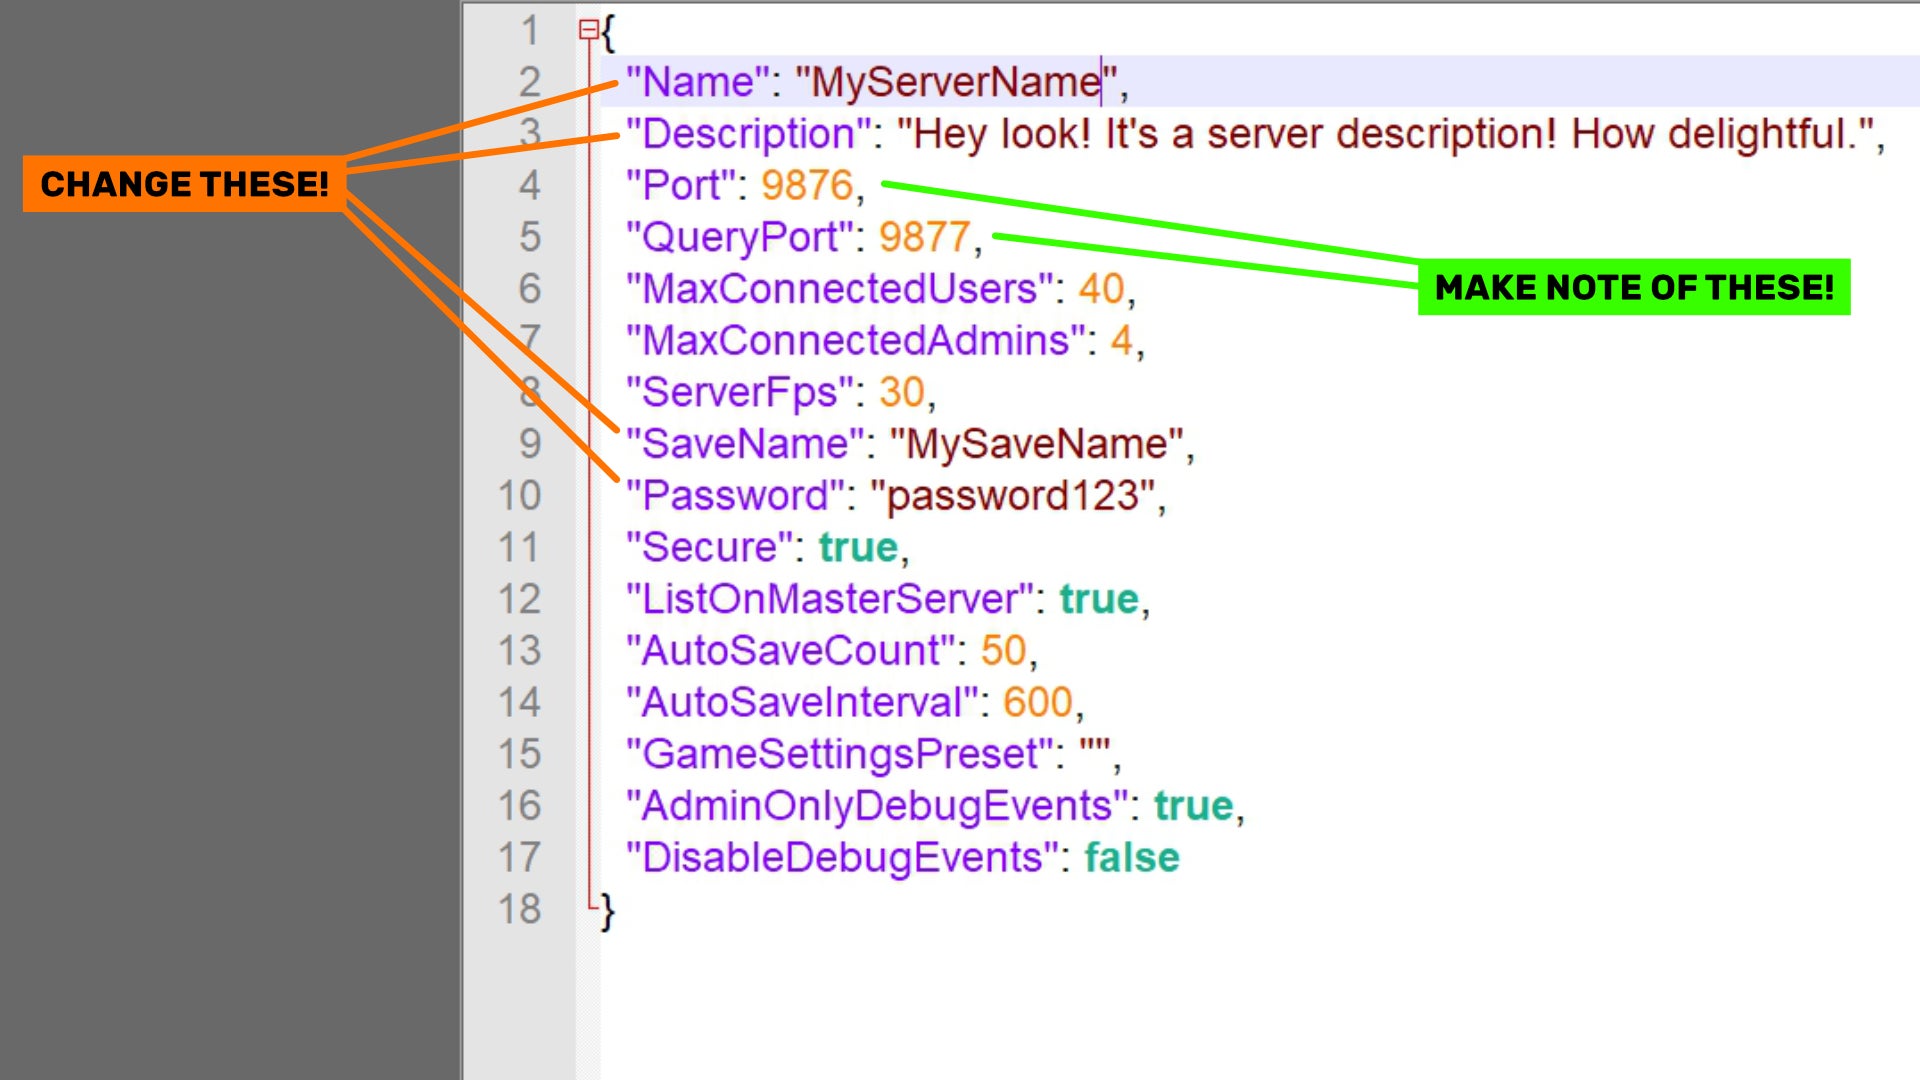
“adminlist.txt”: Add player names to this list to make them into admins on the server. “banlist.txt”: Add player names to this list to ban them from the server. “ServerGameSettings.json”: Edit this file to change various game settings within your server. “ServerHostSettings.json”: Edit this file to change settings about the server itself.
Open up “ServerHostSettings.json” and change the “Name” and “SaveName” lines to match what you chose to be the server name and the save name respectively in the “start_server_example.bat” file earlier. You can also add a password here so that only those you trust can join your server, and a description which is displayed with to your server in the main server list in-game. Also make a note of the numbers next to “Port” and “QueryPort”, because you’ll need this numbers for the Port-Forwarding and Firewall sections shortly. Save and exit this file when you’re done. That’s all you need to change within these files, but of course you can go into the “ServerGameSettings” file to set up the server to be PvP or PvE, and change various other things about how the game works on your server.
V Rising server settings list
Here are some of the most important server settings you can customise within the “ServerGameSettings.json” file:
“GameModeType”: set to either PvP or PvE as preferred. “CanLootEnemyContainers”: set to true to allow players to loot the containers of enemy players. “BloodBoundEquipment”: setting to true allows you to keep your tools and wearables on you after death. “ClanSize”: determines the maximum number of players in a clan. “SunDamageModifier”: dictates the amount of damage the sunlight deals to players. Defaults to 1. “CastleDecayRateModifier”: dictates the rate at which Castle Heart Decay occurs. “DayDurationInSeconds”: how long in seconds a full cycle of day/night lasts. Defaults to 1080. “CastleLimit”: determines how many Castle Hearts are available for each player to place. Defaults to 2. “VSPlayerWeekdayTime” and “VSPlayerWeekendTime”: determines the times of day when players can attack other players on PvP servers. “VSCastleWeekdayTime” and “VSCastleWeekendTime”: determines the times of day when players can raid other players’ castles on PvP servers.
How to start and shut down your V Rising server
Now that everything is set up and ready, you can start your V Rising dedicated server. To do this, just click the “start_server_example.bat” file to launch it. A black window will appear with a couple of lines of text - and that’s it! Your server is now running. However, you may run into issues joining the server. To make sure your server is joinable, have a read of those Port-Forwarding and Firewall sections below. To shut down your server, simply click anywhere in the black server window, and hit “Ctrl+C”. After a moment you’ll be prompted to “Terminate batch job (Y/N)?” - to which you should just type “y” and hit Enter to shut the whole thing down.
How to turn your private V Rising game into a dedicated server
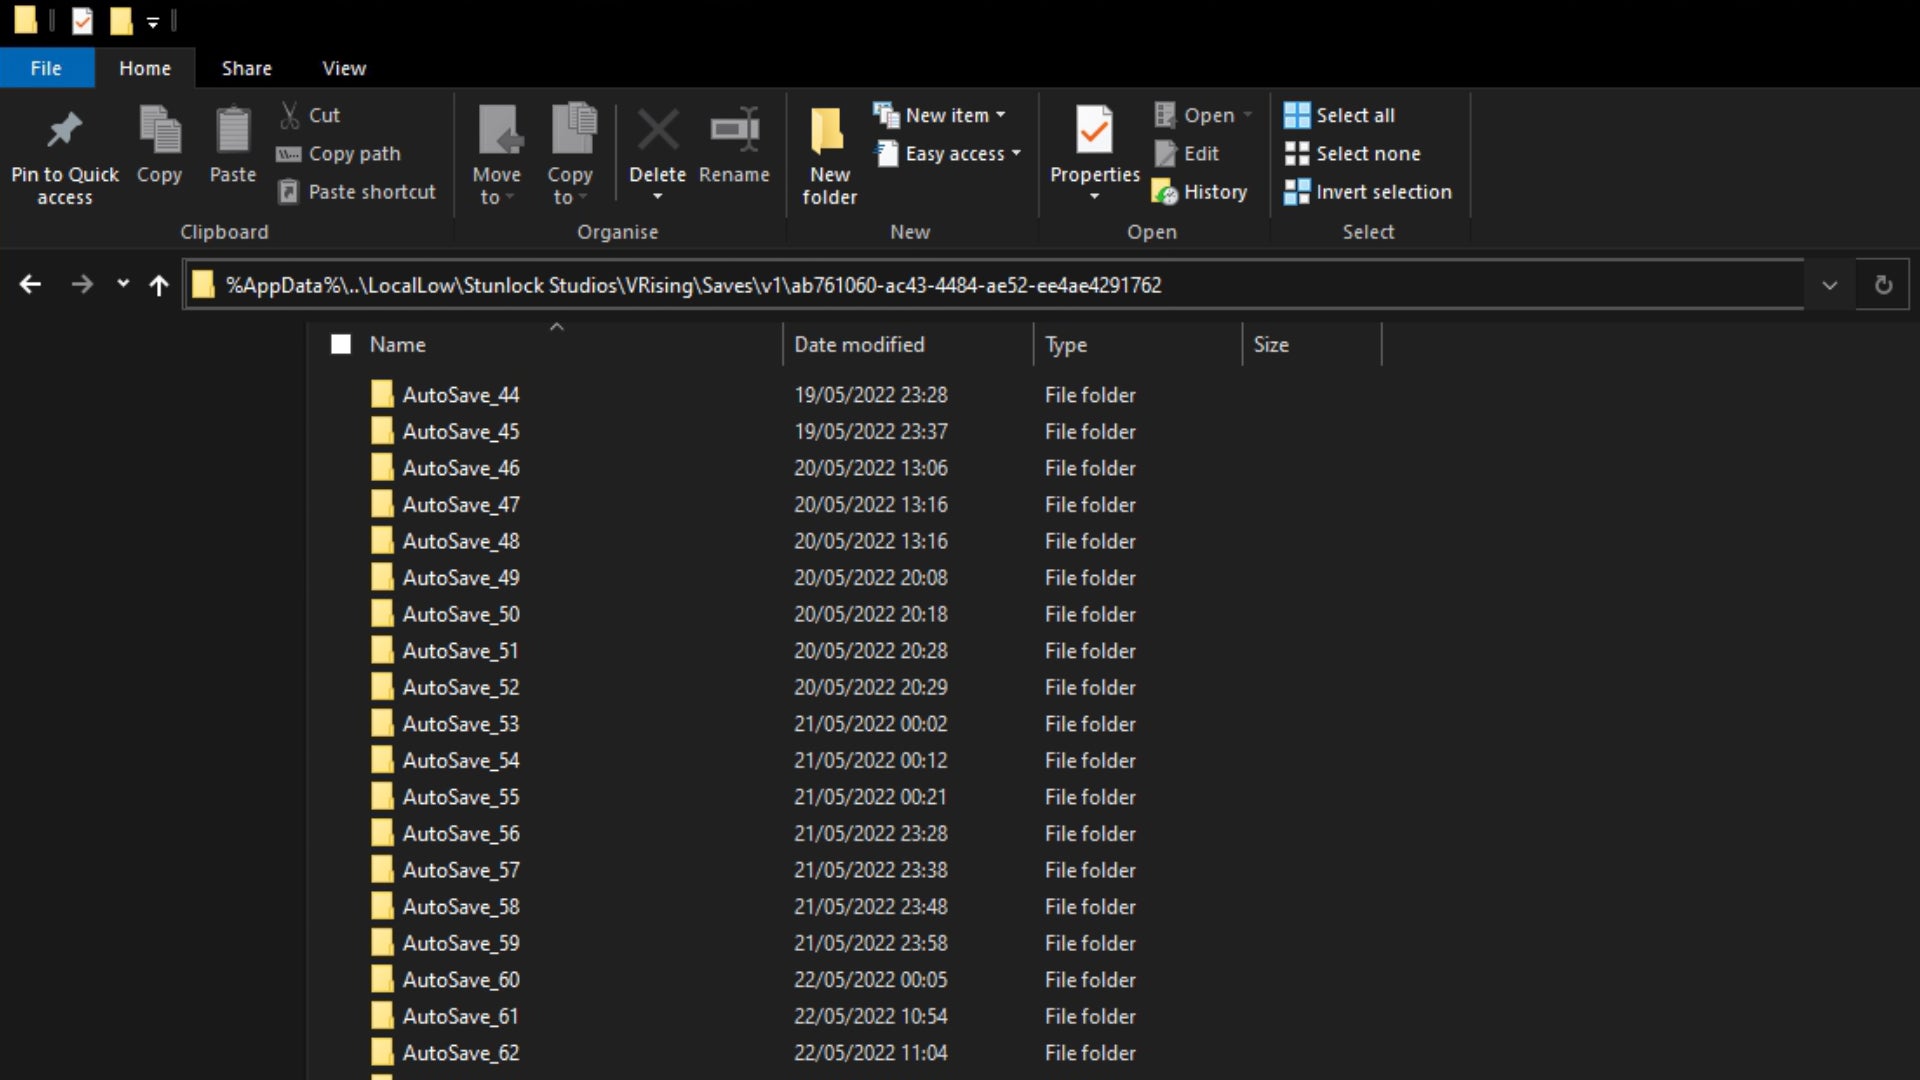
If you want to take your private V Rising game and turn it into a dedicated server, that’s possible too - it just takes a couple more steps. Here’s what you need to do: Once all these steps are complete, you can close everything down, start the server running, and join the server in-game to pick up exactly where you left off in your private world. Only now it’s a dedicated server. Good stuff, eh?
How to set up Port-Forwarding for your V Rising server
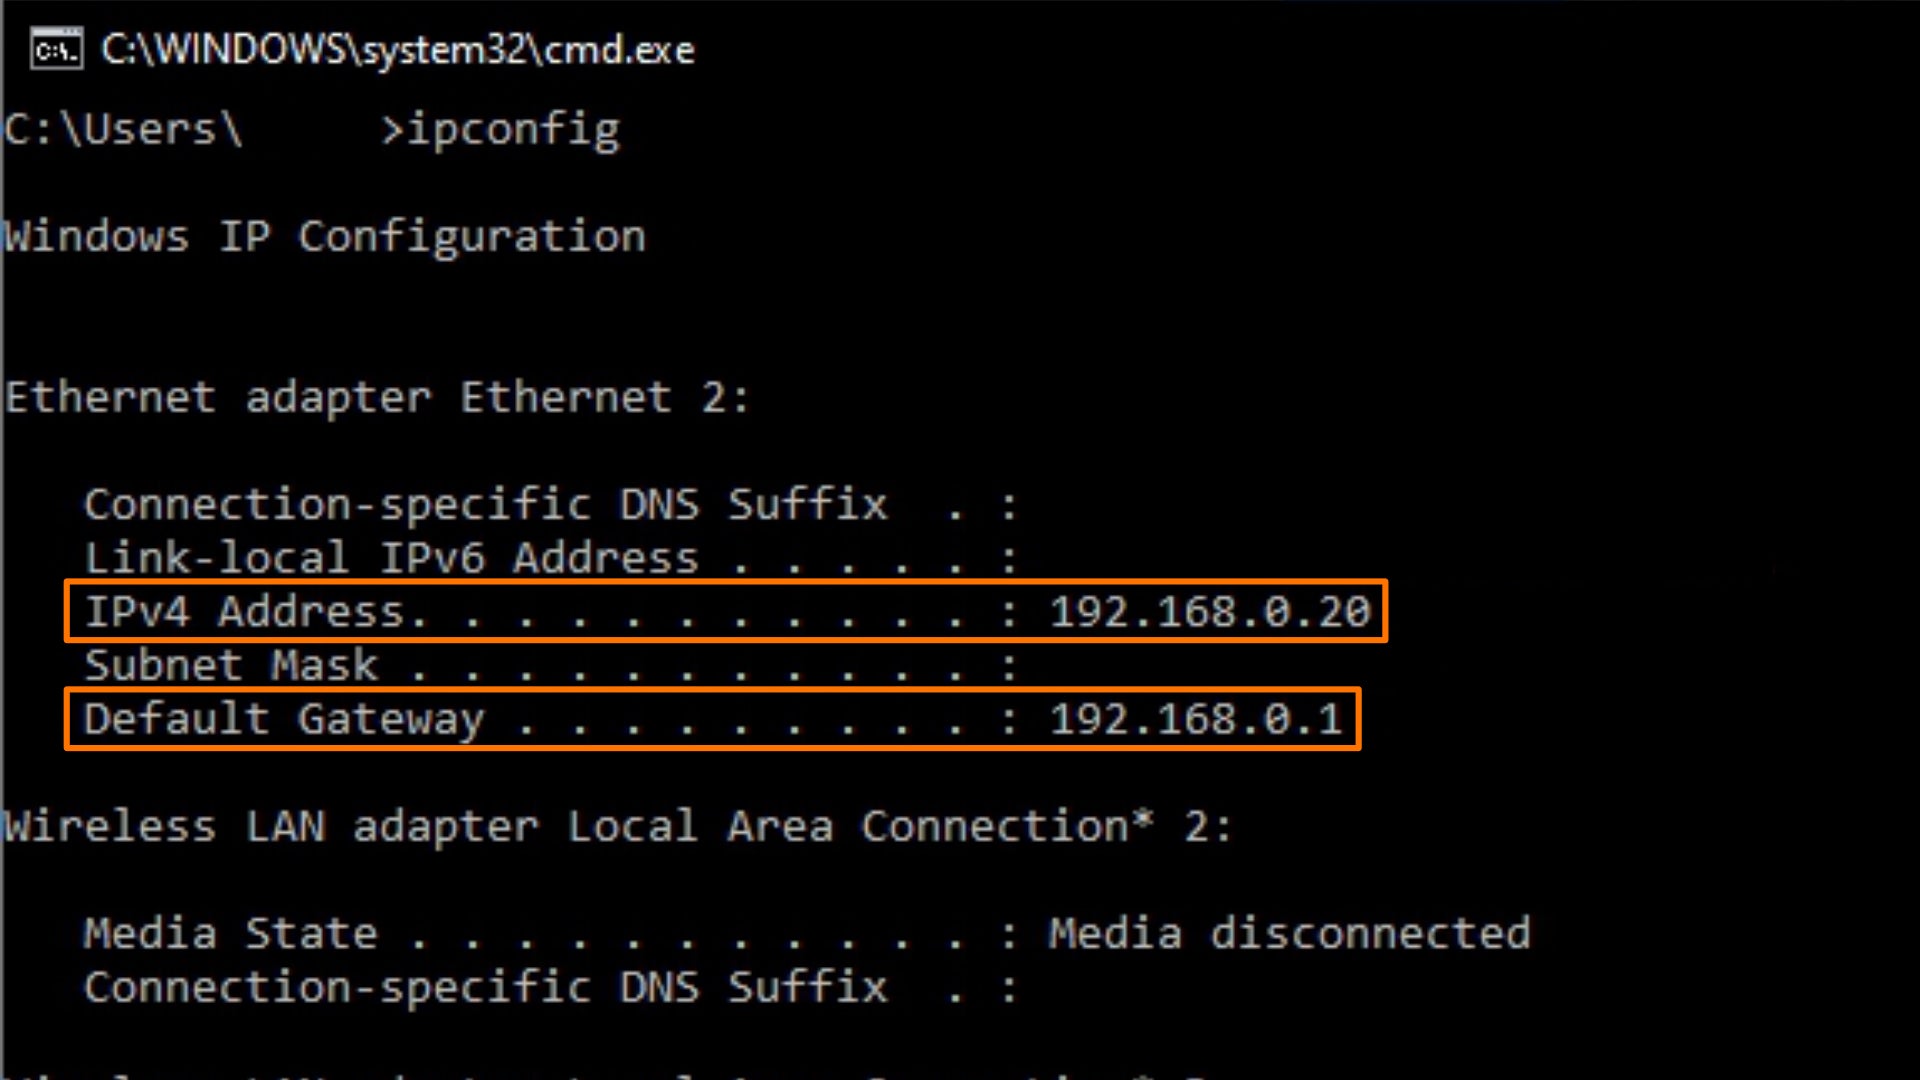
The next two steps are very important. If you run into problems setting up or joining your dedicated server, it’s probably because you didn’t properly go through these steps. To allow your dedicated server to be joinable, you need to set up Port-Forwarding on your router. Everyone’s router is different, so the process here will be different for everyone. But the rough steps should be the same for everyone. First, you’ll need to know your internal IP Address. To find out your Internal IP Address: Using this knowledge, you can login to your router tool by opening your browser and typing your internal IP address into the address bar. Then follow the steps to set up Port-Forwarding for both the numbers that were next to “Port” and “QueryPort” in the “ServerHostSettings.json” file. You’ll likely need your IPv4 address in order to set these up. To find your IPv4 address, follow the above steps for finding your internal IP Address, but this time make a note of the number next to “IPv4 Address”.
How to let your V Rising server through the Firewall
You’ll also need to let the above ports through your Firewall in order for your server to be joinable by others. To do this on Windows, follow the below steps:
How to join a V Rising dedicated server
Joining your V Rising server should be a straightforward process as long as you’ve correctly followed all the above steps. Once the server is running, launch V Rising, then click “Play -> Online Play -> Find Servers -> Display all Servers & Settings”. Then type in your server’s name into the search bar. If it doesn’t appear, make sure you have all the filter options to the right of the search bar set to their proper values. Once you’ve found the server, click “Join Game”.
If your server doesn’t show up in the server list:
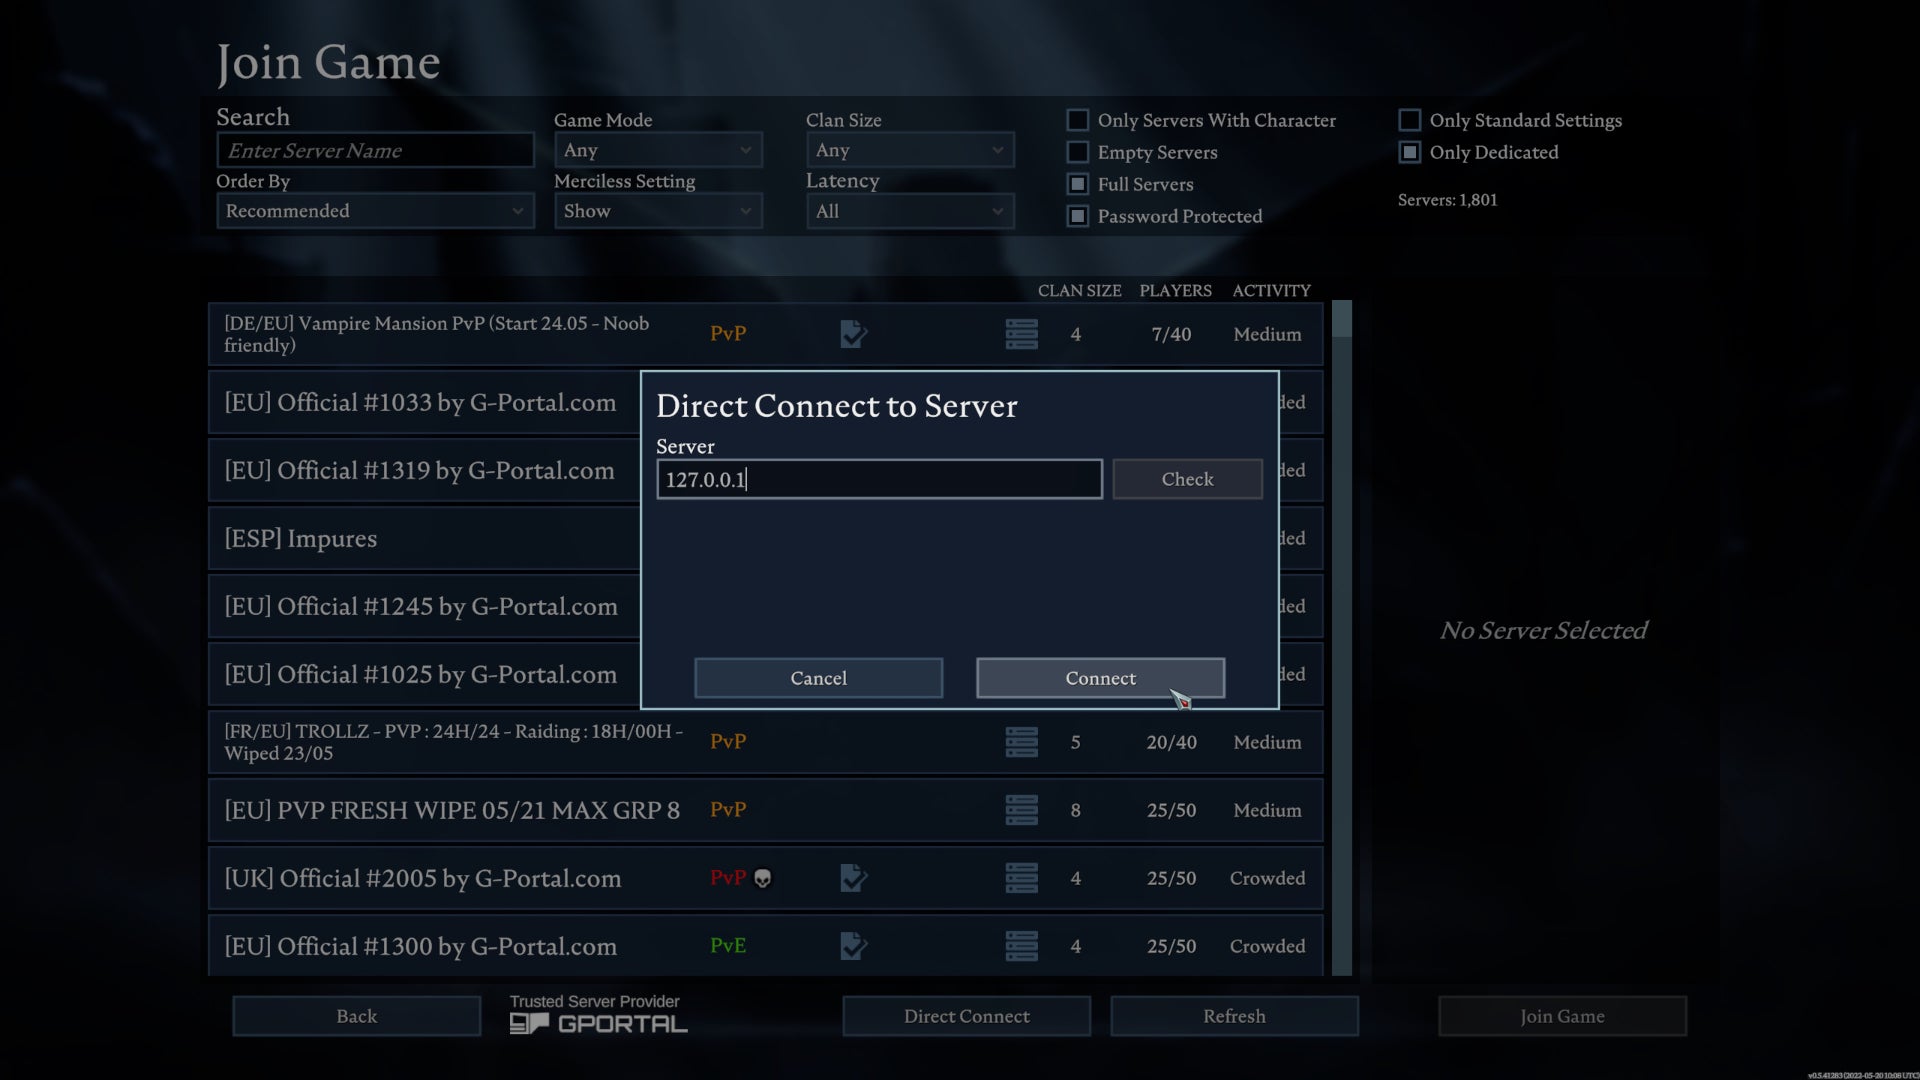
If your server doesn’t show up in the server list, you can still join it using the “Direct Connect” button. Click this button and you’ll have the option of typing in the IP Address of the server. Here’s what to type depending on your situation: If you’re joining from the same PC that you’re running the server on: type in “127.0.0.1” to join. If you’re joining from a PC on the same network as the machine you’re running the server on: type in the server machine’s IPv4 Address to join. If you’re not on the same network as the machine you’re running the server on: type in the server machine’s external IP Address to join. To find out your machine’s external IP Address, just go to What Is My IP Address and use the address it prints out for you.
Why set up a dedicated server for V Rising?
There are two main reasons why many players prefer to use a dedicated server for playing games like V Rising. First: it doesn’t require you to be playing in order to run the server. In an ordinary multiplayer game of V Rising, the server is only running and joinable while the host is on the server playing the game. With a dedicated server, the host can be out of game, and the server is still useable by other players. The second reason is that you can run a dedicated server on one machine, and play the game on another. This reduces the amount of work that each machine has to do, which can make both the game and the server run better.
How to play V Rising multiplayer without a dedicated server
However, if you don’t want to bother with any of this dedicated server stuff, that’s fine too. And it’s very, very easy in V Rising. All you have to do to play V Rising in multiplayer is start a new game, then open up the Steam overlay with “Shift+Tab” and invite your friend(s) to play by clicking the arrow next to their name and selecting “Invite to Game”. Your friends can also join your game themselves by opening their Steam overlay, clicking the arrow next to your name, and selecting “Join Game”. This is worth trying if the above step doesn’t work for any reason. And that’s all there is to setting up your own multiplayer session of V Rising. It won’t have the benefits of running a dedicated V Rising server, but if you’re not inte.rested in the extra utility and performance benefits, then there’s no real point in setting one up, is there?
How to play V Rising multiplayer offline
One final note for those who wish to play V Rising with others in the same household without an internet connection: as of patch 0.5.41448, this is now possible. Here are the steps for starting an offline server in V Rising: To join the offline LAN server, follow the steps in How to join a V Rising dedicated server above, but when you get to the Direct Connect window, check the “LAN Server” box before adding the server IP Address. That wraps up this in-depth and hopefully comprehensive guide to setting up and running your own dedicated server for V Rising. Now that you’re getting to the actual playing stage, why not check out our V Rising tips and tricks page to get off to a roaring start as a bloodsucking vampire? Elsewhere you can find our V Rising best weapons page, and our guide to building in V Rising.